How to import GNS3 VM on Proxmox

This tutorial will guide you step-by-step on how to set up the GNS3 VM on your Proxmox hypervisor. GNS3 (Graphical Network Simulator 3) is a network simulation tool that allows you to emulate complex network topologies. We will use the latest version of the GNS3 VM at the time of writing (2.2.54) as an example.
Prerequisites
- Proxmox server.
- SSH access to your Proxmox server or direct shell access.
- Basic knowledge of Linux commands.
Step 1: Download the latest GNS3 VM
Open the terminal or web shell on your Proxmox server. You can also use ssh to connect to your server.
Download the latest GNS3 VM version for ESXi from the official GNS3 GitHub releases page.At the time of writing, the latest version of the GNS3 VM is 2.2.54. Use the following command to download it:
wget https://github.com/GNS3/gns3-gui/releases/download/v2.2.54/GNS3.VM.VMware.ESXI.2.2.54.zip
Step 2: Extract the zip archive
Once the download is complete, extract the contents of the .zip file:
unzip GNS3.VM.VMware.ESXI.2.2.54.zip
Step 3: Move and Rename the .ova File
Move the extracted .ova file to the /var/lib/vz/import directory, which is used for importing GNS3 VM in Proxmox. Ensure there are no spaces in the filename for compatibility:
mv "GNS3 VM.ova" /var/lib/vz/import/GNS3_VM.ova
Step 4: Configure Proxmox Storage for Import
- Open the Proxmox WebUI in your browser.
- Navigate to
Datacenter -> Storage -> Local. - Click Edit and ensure the following content options are selected:
ImportDisk Images
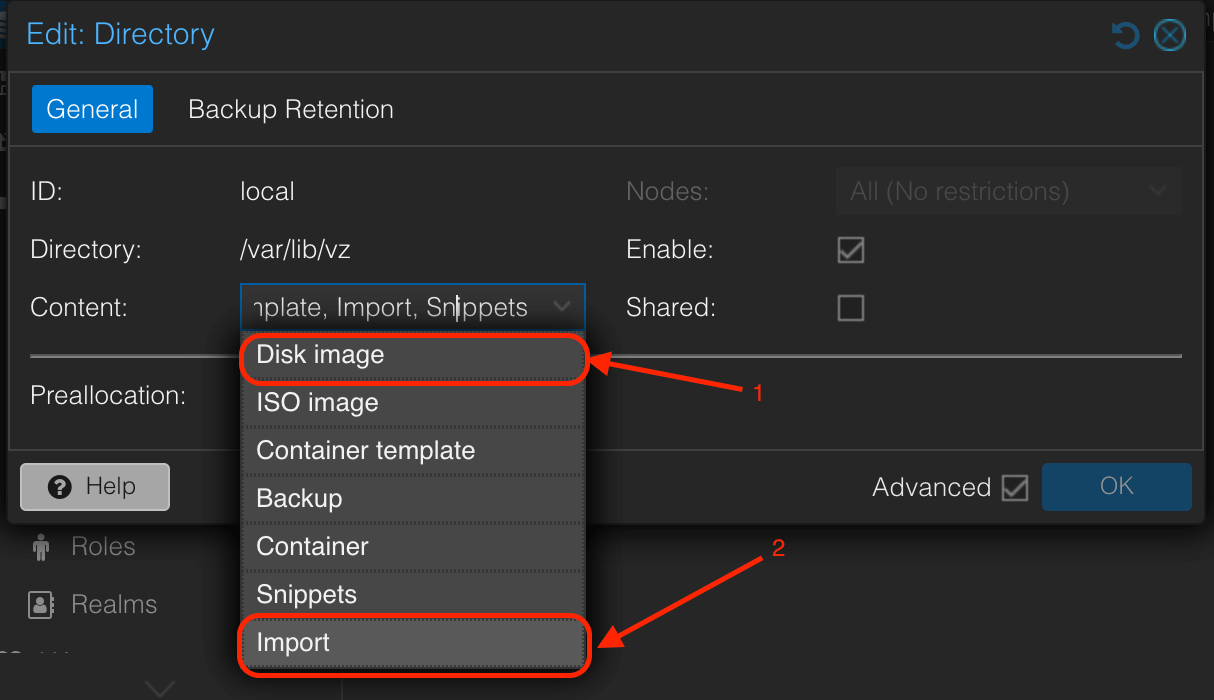
These settings allow Proxmox to import ESXi VM files from local storage (/var/lib/vz/).
Step 5: Import the GNS3 VM into Proxmox
- In the Proxmox WebUI, go to your Proxmox node and expand
Storage -> Local. - Click on the Import button.
- Locate the
GNS3_VM.ovafile you moved earlier. - Select the file and click Import.
- For best performance, configure GNS3 VM with the following settings:
- CPU Type: Select
hostfor maximum compatibility and performance. - CPU Allocation: Allocate at least 2 CPUs to the GNS3 VM.
- Memory: Set the GNS3 VM memory to at least 4096 MB.
You can always adjust these settings in the VM's hardware configuration section within the Proxmox WebUI.
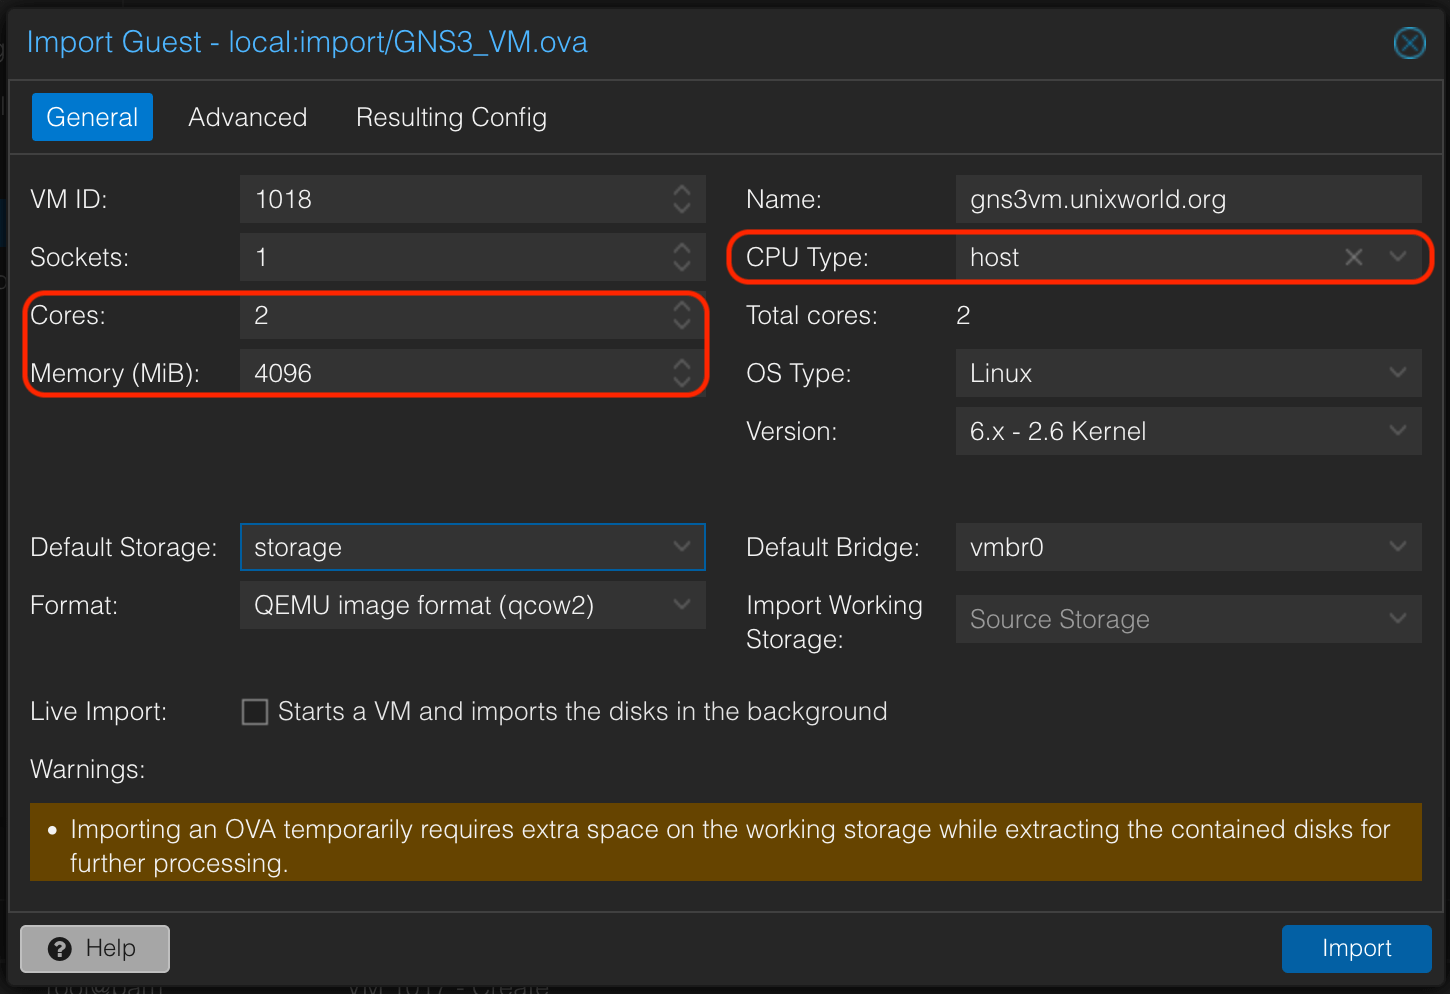
Proxmox will now import the GNS3 VM into your environment. Once the process is complete, the VM will be available for use.
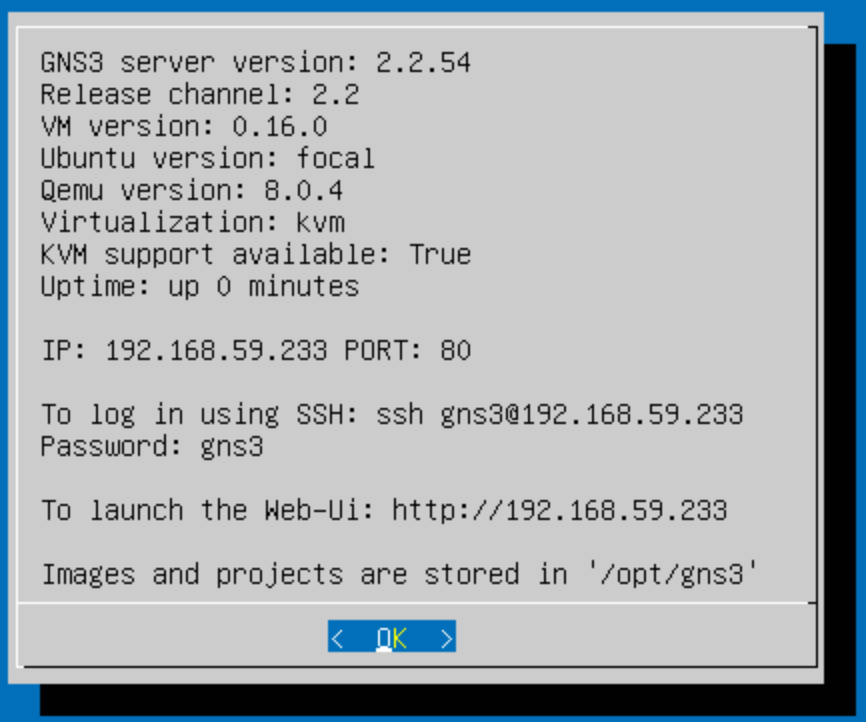
Step 6: Start the GNS3 VM
- Once the VM is imported, start it by selecting the VM in the Proxmox WebUI and clicking Start.
- As soon as VM boots, it will display information on how to access GNS3.
- Take note of the IP address or hostname displayed on the VM console. You will use this to connect to the GNS3 VM from GNS3-GUI or via web browser.
Conclusion
Congratulations! You have successfully installed and configured the GNS3 VM on your Proxmox server. You can now start creating and simulating complex network topologies for learning or testing purposes. If you encounter any issues during the process, you can drop a comment.


